












































































































































































How to Bend a 90 Stub-Up, Worked Through in 3/4 EMT
One 30 inch stub in 3/4 EMT, bent from tape to level: where the 6 inch take-up comes from, where the mark goes, springback, and how to check it.

Take the stub height you want, subtract the take-up stamped on your bender, and mark the pipe at that distance from the end. Set the bender’s arrow on the mark and pull to 90. For a 30 inch stub in 3/4 inch EMT on a bender with a 6 inch take-up, the mark goes at 24 inches, and when you are done the tape should read 30 from the cut end to the back of the bend.
That is the method. What follows is one stub, bent from start to finish, with the reason behind each number and the places where an inch goes missing.
The job
Here is the setup, with illustrative figures. A run of 3/4 inch EMT comes along an electrical room wall and has to turn straight up into the bottom of an enclosure. Measured from the back of that horizontal run, the pipe needs to finish 30 inches up, inside the connector.
You could buy a factory elbow and cut it to length. The Steel Tube Institute’s guide to field bending says why bending it yourself is normal: factory elbows exist in a full range, but they do not cover the variety of stubs, offsets and saddles that real routing throws at you.
So: one stick of 3/4 EMT, one hand bender, a tape, a pencil and a torpedo level.
What the take-up is measuring
Every hand bender has a take-up figure, sometimes called the deduct, and it looks like a magic number, but it is the bender’s radius plus half the pipe.
When the shoe wraps the tube, the stub does not rise from the mark. It rises from the far side of the curve. The distance from the mark to the outside face of the finished leg is the radius of the bend to the centre of the tube, plus half the tube’s outside diameter. Klein publishes one half of that sum and the total. Its 3/4 inch EMT bender page gives a centreline bend radius of 5.5 inches and a stub-up height of 6 inches. Wheatland’s steel EMT submittal sheet gives 3/4 inch EMT an outside diameter of 0.922 inch. Half of that is 0.461. Add it to 5.5 and you get 5.961, which rounds to the 6 inches cast into the bender.
It holds across the sizes:
| EMT size | Klein centreline radius | Half the outside diameter | Sum | Klein take-up |
|---|---|---|---|---|
| 1/2” | 4.625” | 0.353” | 4.978” | 5” |
| 3/4” | 5.5” | 0.461” | 5.961” | 6” |
| 1” | 7.375” | 0.582” | 7.957” | 8” |
The radii come from Klein’s product pages for each bender, the diameters from Wheatland’s sheet. None of the sums is more than five hundredths of an inch off the stamped figure.
Two things follow from this. The take-up belongs to one bender and one pipe size, so borrowing a figure from a different shoe gives you a different stub. And because the sum includes half the outside diameter, the stub height is measured to the back of the bend, the outside face. Measure to the inside face instead and you lose a full outside diameter, 0.922 inch on 3/4 EMT, which is near enough an inch to make you think the bender is wrong.
Marking the stick
Thirty minus six is twenty four. Measure 24 inches from the end of the stick and mark it.
Make it a ring, not a tick. The Steel Tube Institute asks for a thin line that goes completely around the conduit, so the mark stays visible if the pipe rolls. It costs nothing.
Measure from the end that becomes the stub, and from the actual end of the pipe. If the factory end is damaged and you plan to cut it off, cut first and then measure.
Setting the arrow, not the star
Lay the pipe on a flat floor, set the bender on it the way its instructions show for a stub, and slide it along until the arrow sits on your ring.
Klein’s bender guide labels the parts of the head, and two of them get confused. One is the alignment arrow. The other is a 90 degree back-of-bend mark, which shares its spot with the 60 degree centre mark. The arrow is for a stub measured from the end. The back-of-bend mark is for the second 90 of a back-to-back, where you measure from a fixed point to where the back of the bend has to land. Put a stub mark on the wrong symbol and you have moved the bend by the distance between the two marks.
Gardner Bender’s hand bender how-to guide spells out the same stub method: measure the length, subtract the deduct from its Table 1, mark that length from the end, line it up with the arrow, and bend until the 90 is formed. Its back-to-back method uses a B or a star instead.
Pulling it to 90, and a little past
Foot first. The Steel Tube Institute’s wording is specific: a solid, flat surface, and steady foot pressure on the pedal, enough to keep the conduit and the bender marks aligned and the pipe in the groove for the full arc. Put all the effort into the handle and the bender can lift off the pipe halfway round, which is how a tube leaves the groove and flattens.
When the stub reaches vertical, keep going a touch. Steel springs back when you let go of it, and the same guide says to compensate for springback by over-bending slightly. How much depends on the pipe, the bender and your feet, so bend one stub, check it, and remember how far past vertical you went.
Watch the size of the bender as well. EMT in a shoe made for a larger size will flatten and can kink, according to the Steel Tube Institute. Klein’s 3/4 inch EMT bender also takes 1/2 inch rigid, which is fine, but a 1 inch EMT shoe will not make a clean bend in 3/4 EMT however careful you are.
Checking it before it goes on the wall
Stand the stub on a level patch of floor and put the torpedo level on the vertical leg, or hold a framing square in the bend. Bubble centred both ways, or the square sitting flat on both legs, and you have a square 90.
Now the tape. Hook it on the cut end and read to the back of the bend, which is the outside face of the horizontal leg. It should say 30. If it reads closer to 29 and a sixteenth, check you are not reading to the inside face before you blame anything else: that is the 0.922 inch outside diameter showing up.
If you went too far past 90, the fix is in Gardner Bender’s guide: slip the bender handle over the stub and pull back the degree or two you need. If you stopped short, put it back in the bender with the arrow on the original mark and finish the pull.
Where the inch goes when it goes wrong
A stub that misses by about an inch tends to have one of three causes, and they leave different fingerprints.
The take-up came from another bender. If you mark this stub at 25 because you remembered the 5 inch figure from a 1/2 inch bender, the bend still happens 6 inches back on the 3/4 shoe, and the stub comes out at 31. The error equals the difference between the two figures, every time. The numbers are illustrative, but the pattern is not: a van carrying three sizes of bender carries three take-ups to mix up.
The mark sat on the wrong symbol, and the error is roughly the distance between the arrow and the back-of-bend mark on that head.
The pipe was measured from a factory end that was later trimmed, and the stub is short by what came off.
All three are bookkeeping slips, which is why they keep happening to people who bend well.
The same bender with rigid in it
Klein’s take-up table in the same guide lists 1/2 inch EMT at 5 inches, then 3/4 inch EMT and 1/2 inch rigid together at 6 inches, then 1 inch EMT and 3/4 inch rigid together at 8. It is one shoe, so the radius and the take-up are the same.
What changes is the number you look up by pipe size. Gardner Bender’s Table 1 lists rigid and IMC deducts of 6, 8 and 12 inches for 1/2, 3/4 and 1 inch, against 5, 6 and 8 for EMT. So 3/4 inch rigid wants 8 inches, not the 6 that 3/4 EMT gets. If you think in pipe sizes and not in shoes, that is a 2 inch miss waiting to happen. The comparison of EMT, IMC and rigid conduit covers where each one is allowed.
Bigger pipe, where the charts stop agreeing
Up to 1 inch, the published EMT take-ups from Klein and Gardner Bender agree. Klein’s printed table stops at 1 inch. Gardner Bender’s prints 12 for 1-1/4 inch EMT, while the Klein, Greenlee and Ideal profiles in the stub-up screen described below use 11. On a stub feeding a panel, that inch is the margin.
At that size the hand bender is also not the expected tool. The Steel Tube Institute says EMT in 1/2, 3/4 and 1 inch can be bent by hand because of its thinner wall, that 1-1/4 and 1-1/2 inch want a mechanical ratchet bender, and that 2 inch and up go on a power bender. Whatever the machine, the deduct that counts is the one for the shoe in front of you.
The 90 counts against the pull
A stub uses a quarter of the bending you are allowed between two pull points. The Steel Tube Institute notes that the NEC allows up to 360 degrees, and recommends using as few bends as you can and none over 90 degrees, because the wire has to go round every one of them. For multi-conductor control and communications cable it recommends two 90s at most, 180 degrees in total, citing the EIA/TIA-569 pathway standard.
The 2026 edition of the NEC adds a section about that limit. In Minnesota, the Board of Electricity’s NEC 2026 Adoption Review Committee went through the edition, and its meeting minutes, published by the state’s Department of Labor and Industry, summarise section 300.24 as clarifying that the 360 degree limit between pull points applies even when the run changes to another type of raceway. At that meeting on 28 October 2025 the committee voted to recommend that the full Board of Electricity proceed with adopting the 2026 NEC, and whether your area has done the same is a question for the inspector, not a guess.
The bend itself has a code minimum too. The Steel Tube Institute points to Chapter 9, Table 2 for the smallest radius allowed, measured to the centreline of the bend. You can read the table yourself through NFPA’s public online access to its codes.
Doing the subtraction on a phone
One stub is a subtraction you can do in your head. A morning of them, across three sizes and two benders, is where the wrong figure sneaks in.
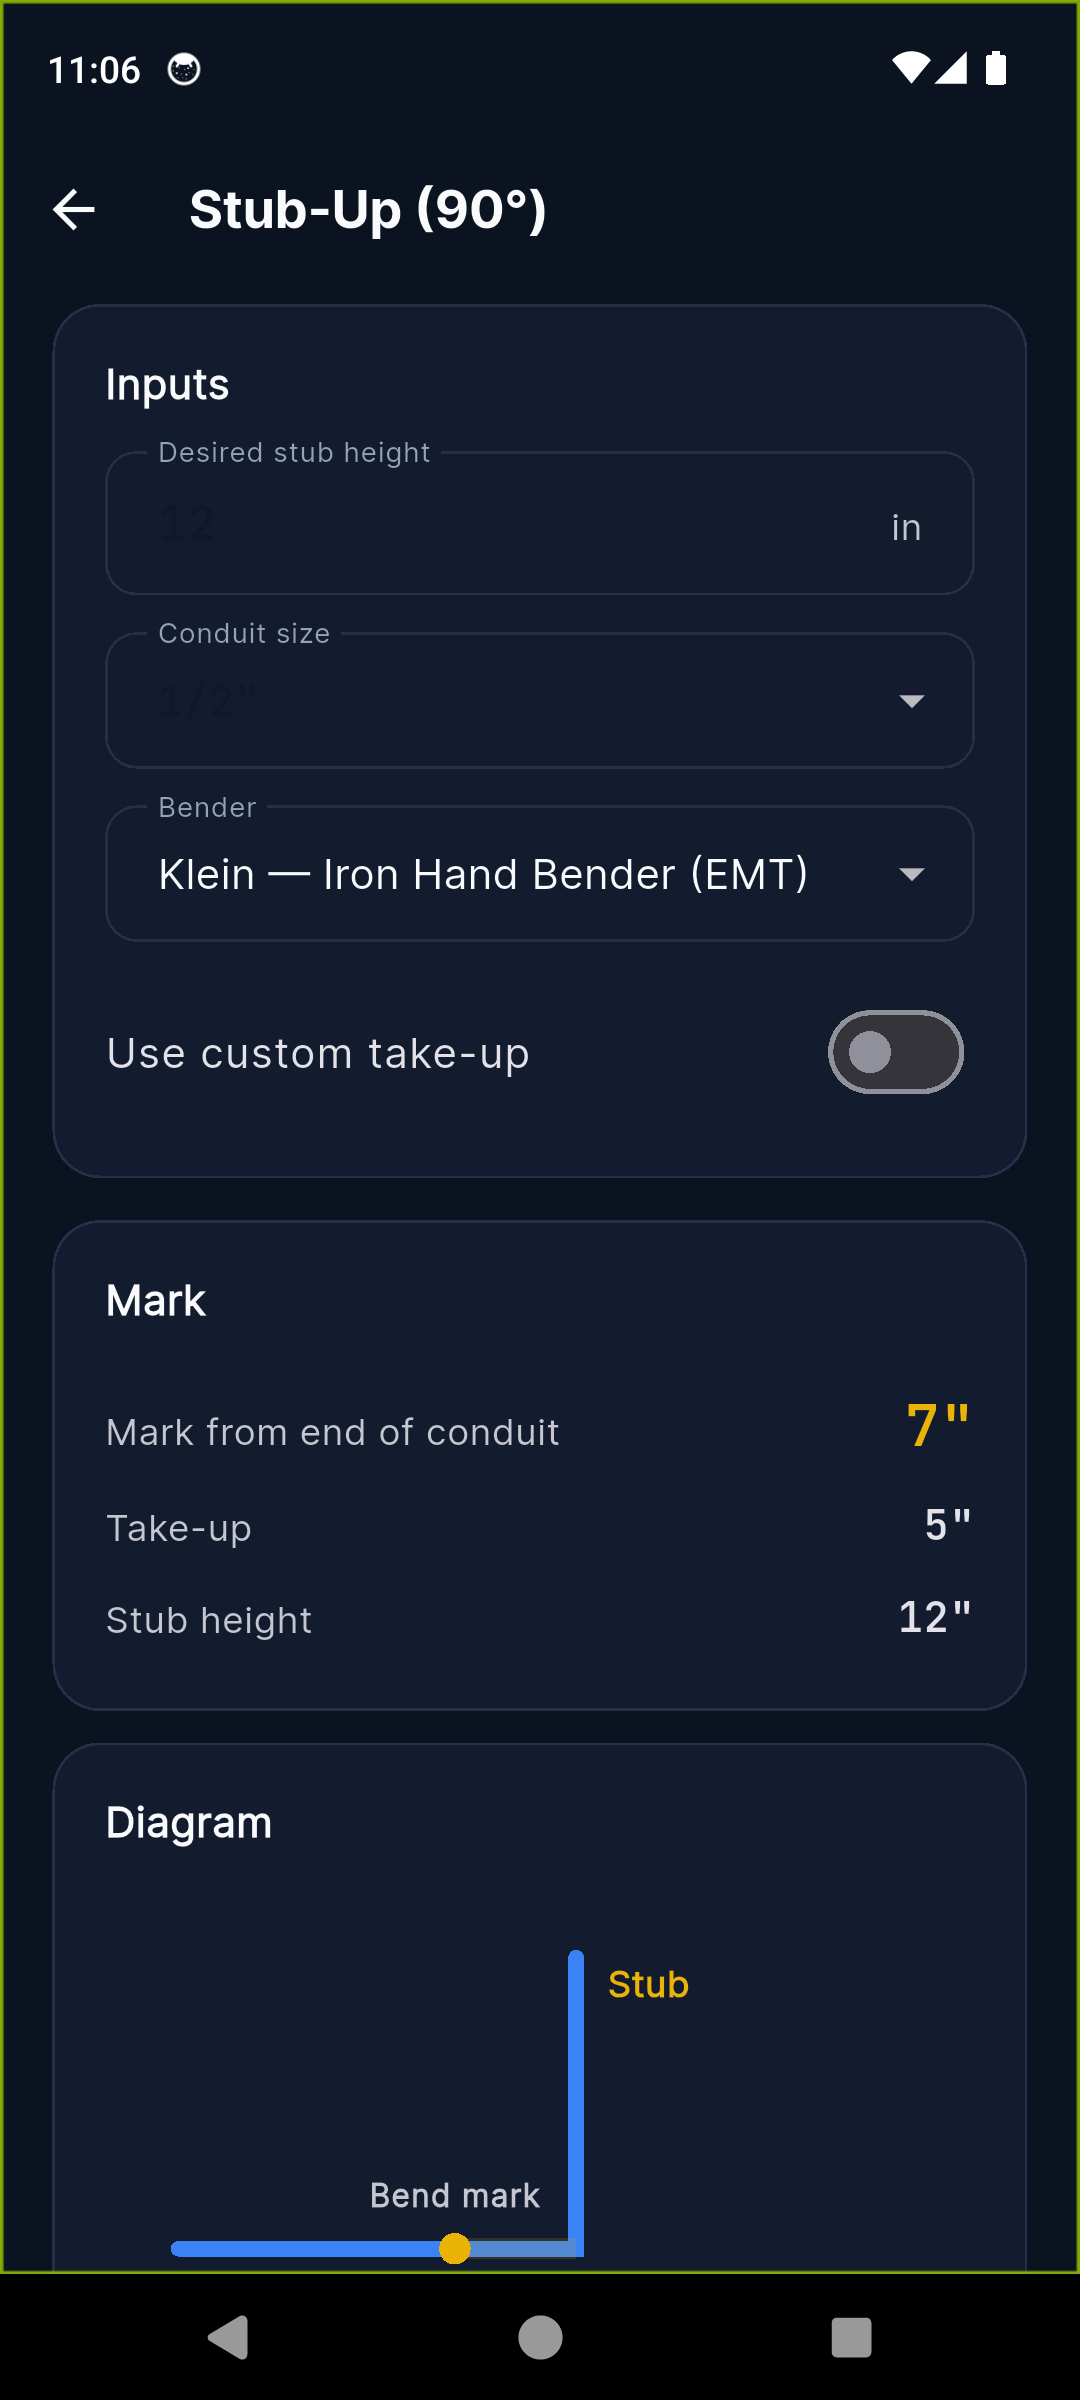
BendPro’s stub-up calculator asks for the stub height, the pipe size and the bender, then gives the mark from the end of the conduit, the take-up it used and a drawing of the bend. The benders it knows are the Klein, Greenlee, Ideal and Gardner Bender EMT benders plus the Klein rigid and IMC bender. A default bender and size can be set once in settings, and the app switches to millimetres if you prefer. Where it has no figure for a size, it says so: pick Gardner Bender with 1-1/4 inch and the screen tells you there is no deduction listed and asks for the one stamped on your bender shoe, which you type in with the custom take-up switch. Results go to history when you press Save. On the paid tier, Export diagram turns the drawing, with the stub, the take-up and the bend mark, into an image you can send to whoever is bending the next one.
It does the arithmetic. It does not see your bender, which is why the screen ends with a reminder to confirm the take-up against the deduction stamped on your bender shoe before bending.
This is general information about hand bending, not professional advice. Bend radii, the bend limit between pull points and the code edition in force are set by your jurisdiction, so confirm them with the authority having jurisdiction, and use the take-up printed on your own bender over any chart, this one included.
If the next job is a run with a stub at one end and an obstruction in the middle, the conduit offset guide covers the multiplier and the shrink, and BendPro has the stub-up, offset and saddle calculators on one home screen when you want the run worked out before you cut the first stick.
Common questions
What is the take-up on a 3/4 inch EMT bender?
Six inches on the common hand benders. Klein lists a stub-up height of 6 inches for its 3/4 inch EMT bender and Gardner Bender prints a 6 inch deduct for 3/4 EMT. Subtract it from the stub height you want and mark the pipe at the result, measured from the end.
Do I measure the stub to the inside or the back of the bend?
To the back. The take-up figure already includes half the pipe's outside diameter, so it assumes the tape runs from the cut end to the outside face of the other leg. Measure to the inside face and you are one outside diameter short, which is 0.922 inch on 3/4 EMT.
Why does my stub come out a little short or long?
The usual causes are a take-up figure from a different bender or size, the mark sitting on the wrong side of the arrow, or the pipe springing back short of 90. Read the deduct off your own bender head, keep the arrow on the mark, and pull slightly past 90 so it settles square.
Is the take-up the same for rigid conduit?
Not size for size. Klein's 3/4 inch EMT bender takes 1/2 inch rigid as well, and Klein gives both a 6 inch take-up because they share the shoe. Gardner Bender's table lists rigid and IMC deducts of 6, 8 and 12 inches for 1/2, 3/4 and 1 inch.